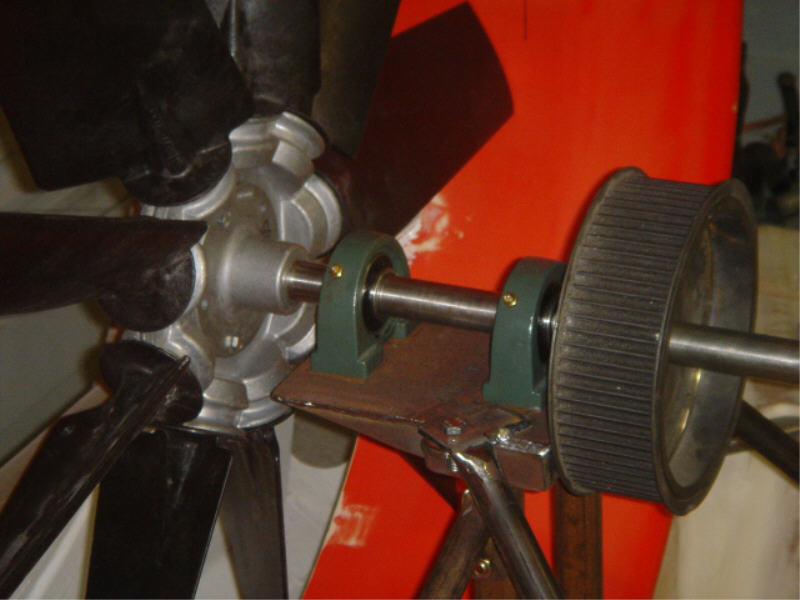
Got all the 9 blades in place, not yet all cut to the correct tip clearance (i’m aiming for 5mm clearance) but they are in and spinning for now. You can also see here that i have the fan gear now sitting on the shaft, when i bought this gear it was F****n heavy so i had to machine the insides of it down. the best i can get it down to is 2.5kg still heavy for a gear i guess but considering it must of been around 6 kg when i bought it that’s a hell of a lot better. All components on this shaft are locked in place by two grub screws per item. I’m a little reserved about relying on just grub screws but a engineer i know said that it “should be fine”
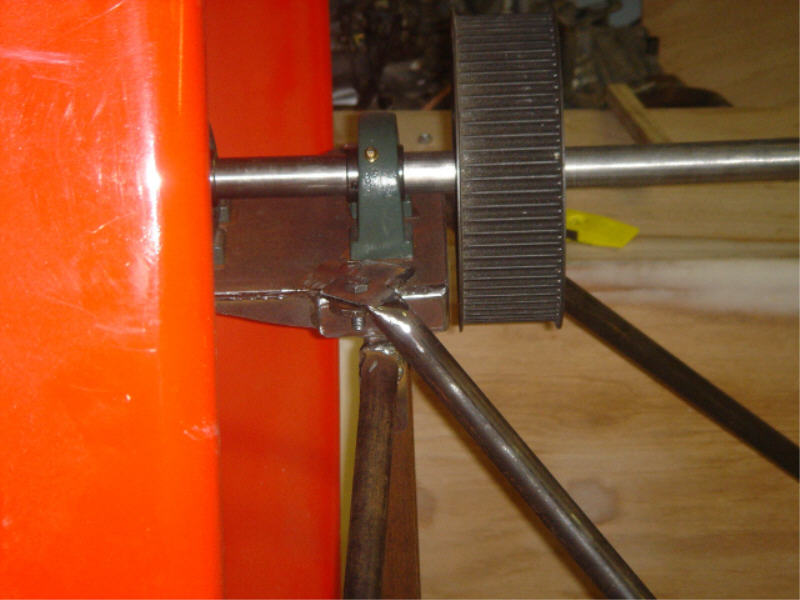
Here’s just another angle of the top shaft assembly. I have the gear overhanging the end of the frame work, in a ideal world i’d say it would of been nice to have the gear between both plummer blocks (bearing housing for those that call them another name) to spread the load on both bearings but i preferred it this way cause it allowed me to make the frame narrower and less bulky overall which in return helps me to save weight and gives things a bit more of a “slim line” look 🙂
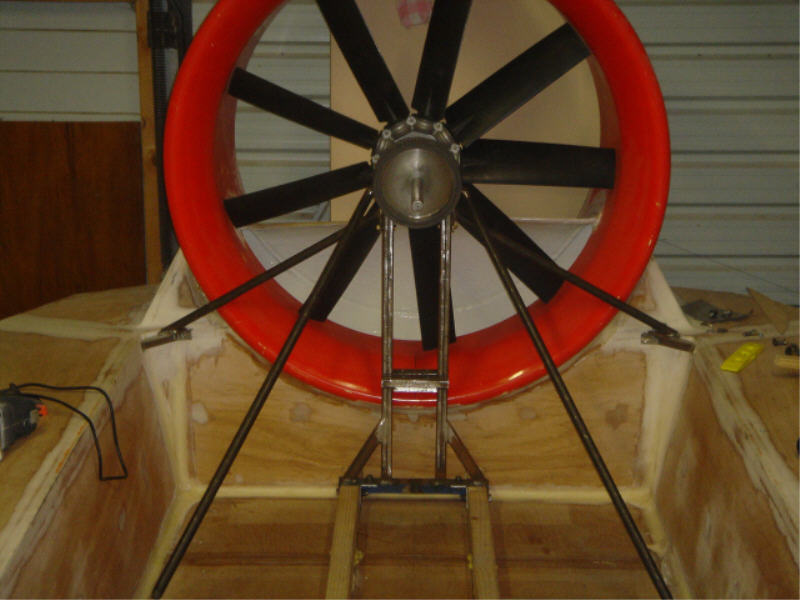
Here’s a front view of all blades fitted and the forward facing support bars fitted. At the lower end of these front support bars i actually made them adjustable, no real reason for doing so other than “coz i can” but i thought what the hell it may have a use if the thrust pulls on the frame too much i can tension it a little more *shrug*
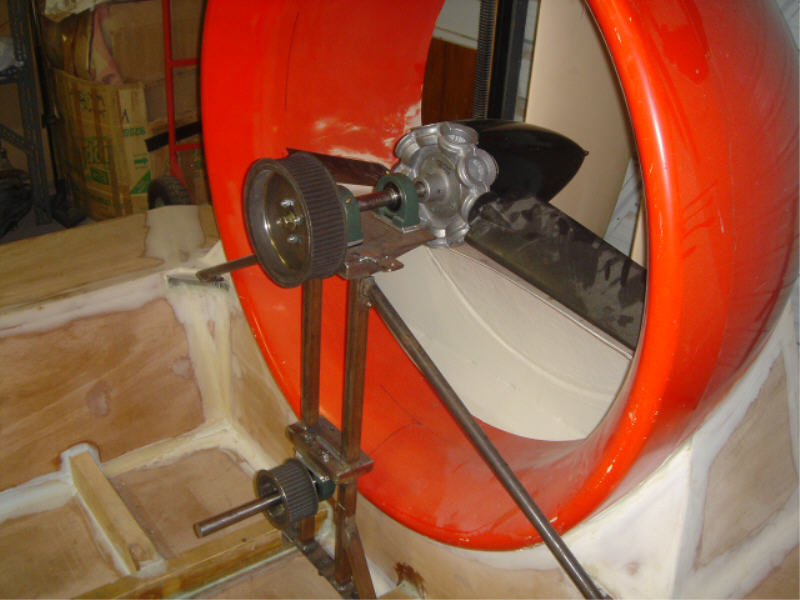
In this picture it shows that i’ve added the fan cone to the rear of the fan, its a fiberglass cone i bought when i got the splitter plate, Today i drilled either end of the fan shaft and taped a thread into them. The bolt that goes into the end of the fan side had a extra long head on it so i drilled a 5mm hole down the centre of that and tapped a 6mm thread into it so that i could screw a length of 6mm threaded rod into the head of the bolt to mount the fan cone. You might also notice that i have added two lengths of 2 by 3 wood along the floor joins where i extended the floor, this should make that join alot stronger.
Today is 4 days after the last photo and during those days i took two off work so i could put some time into the craft. Didn’t achieve all that i wanted but that’s always the case when you take time off work.
When i started this craft i was told by a hovercraft builder to “build the hull and forget about making the seat and steering for now till you get the motor fitted, also add the duct, make the transmission, fit the fan and THEN fit your subaru motor and by placing a pole under the craft and getting the balance right by moving your motor back and forth till it rocks on the pole.” Well during the second day of my day off i decided that i have done what he suggested and so maybe i can fit the motor and work out the balance of the craft, upon doing so i couldn’t help but think that seeing how little things have to be shuffled around to change the balance completely of the craft that trying to get the CG of the craft without the other items such as exhaust, seat, battery, radiator, steering fuel tank was not a accurate way to do things in my mind. There has now been a change of plans 🙂
I have now decided that although i don’t know how long the seat is to be till i fit my motor, i will in fact build 3/4 of the seat so that i can then add my steering and all other items that will sit up the front of the craft. I will also make 3/4 of my exhaust system (another item i can’t finalise till motor is fitted) and any other item that goes on the craft so that by the time i do decide to fit the motor there will be very little guess work into the weight of things. To me that seems like a more sensible way to do things and the only addition i will have to do once the motor is fitted that is of significant weight is add the extension to the seat to make up the other 1/4 that i didn’t make previously.
A hovercraft rides on a ‘Bubble’ of air so balance of the craft is one of the critical stages along with weight, and when you put alot of time and effort into your hobby like i have with this thing i’d rather it be right rather than guesstimating things. Therefore my tip for today to other new hover builders is that if you are not building to the plans DO NOT rush things, and think things through fully and from multiple angles before doing something that’s not in the plans and ask questions. I’m sure the effort and delay will be well worth your while in the end. (i’ll let you know heheh)